Beer Cheese Soup
Jul 26, 2014 Author: Jessy | Filed under: FoodWhen it is 90 degrees and sunny you may not be thinking about soup especially a creamy, warm beer cheese soup, but as soon as the fall days hit you will be glad you have this recipe saved.
Beer Cheese Soup
4 cups chicken broth
1 can sliced carrots or if you want to do the work, 1.5 cups of carrots
1 can diced potatoes or again if you want to do the work, 1.5 cups of peeled and boiled potatoes
1 cup chopped celery
1 cup diced onion
2 teaspoons of garlic
2 -12 oz cans of beer- I used Coors Light!
1 can cream of chicken soup
¼ cup butter
1/3 cup flour
4 cups of milk
1 inch slice of Velveeta cheese
3 cups of shredded Colby jack cheddar cheese mix
2 tablespoons of Worcestershire sauce
1 tablespoon of Dijon mustard
2 teaspoons of hot sauce
1 teaspoon of cayenne pepper ground
1 teaspoon dry ground mustard
½ teaspoon pepper
½ teaspoon of salt
In a large soup pot add chicken broth, sliced carrots, diced potatoes, celery, onion, garlic and both cans of beer. Simmer until vegetables are soft. Add the cream of chicken soup to this mix.
Mix the seasonings in a small bowl, Worcestershire sauce, Dijon mustard, hot sauce, cayenne pepper, ground mustard, pepper and salt and stir to combine. Add these seasonings to the chicken broth veggie mixture.
Meanwhile in a large saucepan make a roux by melting butter, whisk in the flour, add the milk and simmer until thick, being careful not to scorch whisking regularly.
Once the roux is thick and hot add Velveeta allowing it to melt and mix, then add the 3 cups of cheese.
Slowly add the roux, milk, and cheese mixture to the large stockpot with seasonings and veggies and cook on low for 10 minutes to fully mix the ingredients. After 10 minutes, the soup is ready to serve.
Serve it with bread or popcorn.
Makes about 8 adult servings
Best Way to Remove Wallpaper
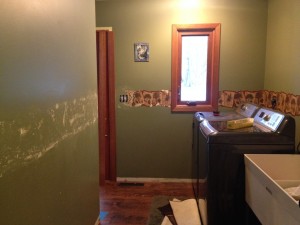
Apr 14, 2014 Author: Jessy | Filed under: Home & Garden, Product Reviews, Projects and CraftsWe purchased a new house a few months back and there was a tree wallpaper border in the laundry room. We were replacing the trim and wanted to repaint the laundry room to match the adjoining great room. The wallpaper border was peeling and curling on the edges so I was sure it would be easy to remove. I made the first rip on one of the loose edges and only got about 1 inch off, now it was too late, I couldn’t go back, I tried the other peeling edge, no better luck.
I remembered the previous homeowner left two gallons of wallpaper remover gel in the basement when they left. I ran downstairs, grabbed a jug, grabbed a sharp knife to score the wall, got a paint tin and a paint roller and started rolling. I scored the heck out of the wall, coated the wallpaper with a thick layer of wallpaper remover and let it sit for 30 minutes. I came back 30 minutes later and was ready for the magic to begin, ready to use my putty knife and watch the wallpaper just fall off the wall with no effort. I pushed the putty knife to the edge of the border and was greeted with a fully stuck border. I scraped and scraped and got nothing, I reapplied the wallpaper remover, and tried removing it after round two, nothing, then I reapplied again and covered it with a layer of saran wrap and let it sit for another 3o minutes, went back at it and was greeted with more of the same, a stuck layer of wallpaper. I tried a new method and used a water spray bottle to saturate the wallpaper that had been coated with plenty of wallpaper remover and finally was able to remove that section with lots of elbow grease. I got small chunks off of the 10 foot area bit at a time from the wall and finally finished one wall after about 4 hours. Yes, seriously.
I know this wallpaper was not properly sized, maybe if the previous homeowner had prepped the wallpaper correctly the wallpaper remover would have worked.
I posted a photo of this frustrating wallpaper removal project on my facebook page with the description, “I am pretty sure they sold this house because they did not want to remove this wallpaper!” I had many suggestions from my friends on how to get the rest off. I could have rented steamer to remove the border but I was only removing a small section of wallpaper so I did not. I wanted to test the typical homeowner wallpaper removal methods recommended by my friends. I decided to try all of them in a side by side test, I also took photos to see what method worked best.
I went and picked up a few supplies from Menards to make the job easier. I got a scraper tool and a wallpaper scorer tool.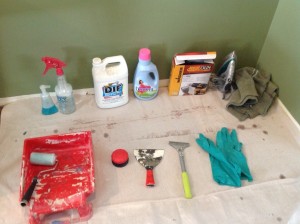
I divided the wall into five separate sections, marked each with a permanent marker, scored those that needed to be scored and started trying each method.
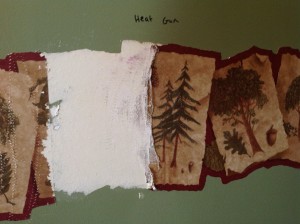
My first section of wall was the hot iron and wet towel method. This is a home made steamer. I soaked the towel, hung it on a hook, so I could have one hand free for the iron and one for the scraper, I pushed the iron on the wet towel to create lots of steam. I was not able to get much off so I quickly scored it in order to get more steam behind the wallpaper. I then tried again. This time I was able to scrape small sections off the wall at a time. About an iron width section at a time, it took some elbow grease, but it worked! It took time, but was much less work than my work the day before.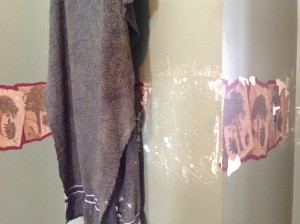
My second section was a heat gun. This was interesting and is what wallpaper pros use to remove wallpaper in office buildings. We had a heat gun, I turned it on High and started heating up the wallpaper to see what would happen. It made the plastic coating melt and I was able to scrape it off with the scraper. I removed the entire plastic coating with a slow but relatively easy process. It was a hot process, the whole room smelt like melted plastic and created really hot walls. It burnt the paper under the plastic in a few places. But the wallpaper base paper was still stuck firm. I said now what, so I sprayed the whole area with my water bottle and actually heard the wall sizzle, it made steam billow from the screaming hot wall, and was able to scrape the paper backing off with no work at all! My big problem in this one was I was afraid with how hot the wall became, I worried about electrical and plumbing behind the wall. It made the sheetrock almost soft and I bubbled the paint in places under the sheetrock. I had to patch the wall in a few places because of the bubbled paint and the nicks in the soft sheetrock. If you were going to rewallpaper and knew where all of your electrical wires were, this would be a great method, maybe with more practice I would have been able to get it. Keep in mind you are basically throwing glowing red heat at your walls.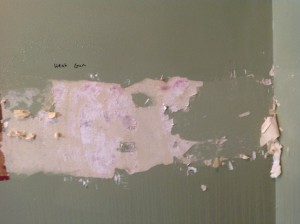
My third section was the fabric softener section, I applied a thick layer of downy to the scored wall and let it sit, applied a second layer, and then tried to scrape the wall, with just fabric softener alone it was not very effective, It worked, but it did not scrape well. I sprayed water from my water bottle and soaked the wall on top of the fabric softener and it came off, a little at a time, small layer at a time but it came off with some effort. This method sure made the house smell great though, if you are into the scent of fabric softener.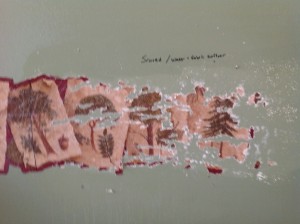
My fourth section was the DIF Gel wallpaper remover again, following the directions, and giving it another shot. I might be a conspiracy theorist but I actually think the remover made the glue adhere to the wall more firmly. It might be DIF’s genius marketing plan, get the consumer to buy more wallpaper remover to remove the wallpaper that the wallpaper remover cemented to the wall. I then tried the same method I used on the painful wall the day before and soaked it with the spray water bottle. I was able to get more off but it was stuck, I actually stopped out of frustration because I was dinging up the wall and working so much harder than I did on the previous three methods, and went to the next section.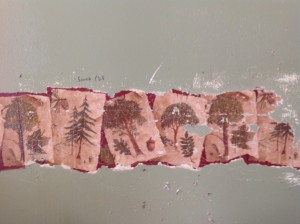
My fifth and final section was a scored wall rubbed with dawn original blue dish soap and sprayed with water. This was amazing! It instantly loosened up the glue! I got the edges off and small sections with the first application. I reapplied and used more water and got the rest of the section off in record time!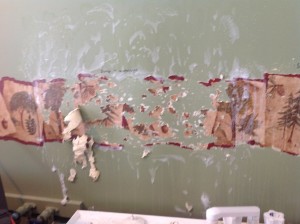
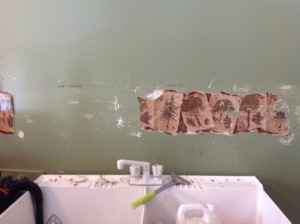
I chose to finish removing the rest of the wall with the dish soap of all of the methods, I felt this was the least amount of effort, mess and work. You can see on my final results which sections did the most damage to the wall. 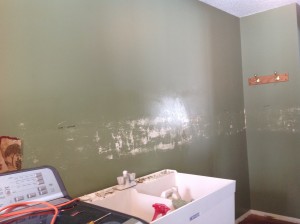
I washed the remainder of the wall off and spackled a thin layer over the wall to cover up the score marks any nicks, burn marks, then sanded, primed and painted the room. I am happy that my laundry room that is no longer 90’s green with a peeling border. If you are trying to remove dreaded wallpaper, hopefully one of these methods will help you have a faster wallpaper removal project!
Home Is Where My Family Is
Jan 19, 2014 Author: Jessy | Filed under: Short StoriesFrom the day I was brought home from the hospital, I have lived in the same house. I lived at home and commuted when I was in college. My husband and I purchased my childhood home from my mom when she moved on. That was the only house I had ever known.
I may have changed bedrooms, I started in the small bedroom, bunked with my siblings in the bigger bedroom, moved to the downstairs bedroom when I was a teenager and needed my space, moved into the master bedroom and felt like I was breaking the rules. We celebrated our birthdays and holidays with relatives now long passed away.
My parents planted trees for each of their three kids. The now big Ash tree was planted for my sister that provides the perfect shade for the deck. A Sunburst Locust was planted for me and a Charlie brown looking, white pine, grown from a seed, was planted for my brother.
The house was perfect for the two of us. We had two extra rooms for an office and a spare bedroom. We had plenty of closet space and lots of room to spare. Then we brought home our first family member, we added a fence for our beautiful Golden Retriever Kodi who lived his whole life in that house from the time he was brought home as an 8 week old puppy to when he unexpectedly passed away in my husbands arms in the living room from cancer.
We brought home our own children from the hospital to that home. I turned the small bedroom from an office into a beautiful unisex nursery, where I laid my first baby in the crib. When our second baby was born, our green striped spare bedroom was changed it into an under the sea, Nemo bed room for our little swimmer. The master bedroom changed from a sterile white, to a bright yellow room, into a serene gray.
We gutted and refinished the kitchen and lived without a stove for months, gutted and rebuilt the basement with our own blood, sweat and tears, remodeled every room of the house and replaced each light fixture until it was comfortable and modern. We landscaped the yard with beautiful perennials that transformed the yard with color throughout the summer.
Our house was where my neighbors were. The two old couples who were still the original owners and have known me my entire life. Our new neighbors and their children who could walk out their front door and instantly have a few other kids to play a game of tag, or ride bikes with.
This was the house where my children received their first skinned knees and foreheads, learned how to ride bikes and learned how to pump on the swings in the backyard.
We had outgrown our house. It no longer fit our kids toys, our two crazy rescue dogs, and it no longer had room to fit the stuff we have accumulated over the years. One night while searching the internet we found a house that was interesting enough to look at. We drove out to the house, and both agreed we wanted to see inside. We scheduled a showing with a realtor the next morning. We walked in and felt comfortable. It was a home that had already been remodeled perfectly for our family and felt like our family. We got financing the next day and the house was ours to pay for four days after we first time we laid eyes on it.
Two crazy whirlwind, exhausting months later, I have officially broke down the last moving box and found a home for most of the stuff we had strategically squished in our old home.
This morning I look around and think, this is my new home. This is where my children will explore in the woods, ice skate on the pond, bring friends over for play dates and sleep overs. Where we will watch our two crazy rescue dogs get old and we will make new memories as a family.
My goal for this summer is to buy two new trees, for my own children. I will plant them in the yard so that someday when they are grown and have their own home, they can bring their own children by and say, do you see that tree in the backyard? That is my tree!
Disney Magic, Bring Your Children
Jan 14, 2013 Author: Jessy | Filed under: Think About It
While watching videos on YouTube about Disney World, with my children when I stumbled across a video that two parents made for young their children while they were on vacation in Disney World without them. They were there for their anniversary and left their kids at home with a family member but to make it up to their children they went to all of the character greetings and filmed the characters saying “Hi” to their children. To show what great parents they were they put it on You Tube.
My favorite part of their video was when Cinderella said “You left them at home? How sad!” Then she looked in the camera and said, “I hope your parents bring you to Disney World next time they come.”
There are many vacations you can go on as a couple that are not much fun for young children. Here are a few things that are not easy to do with a 3 year old: White water rafting, mountain biking, hiking and primitive camping, surfing, canoeing, relaxing on a beach, going to a spa, touring old churches, hiking ruins, clothes shopping, or Vegas is another place that really is not made for young children.
Disney World is a perfect place to bring your 3 year old. This is a vacation that is designed to be the most magical place on earth for little kids. There are kids standing in awe gazing at their favorite characters from movies around every corner, shows set up to dazzle them, rides set up for them to remember in visions the rest of their life. It is not only fun for parents, but brings tears to your eyes and warms your heart when you see how much fun and magic your kids are experiencing.
I will never forget my 2.5 year old son “driving” a race car and yet not being able to see over the steering wheel, he was so proud! Only at Disney! I will also never forget my daughter in her Cinderella dress and glass slippers when the princesses came out to meet her during dinner at Cinderella’s Castle. There are so many memories and wonderful experiences my children have made each time we bring them to Disney World.
Disney World is a place that children are everywhere. You will not be able to be in your hotel room without hearing little feet running down the hallway excited to go to the pool. Everywhere you go you will not be able to forget that this place is made for families, nor will you forget that you left your kids at home and made them miss out on this experience.
You want an adult vacation? Go to an adult vacation and do adult things.
You want to go to Disney World, bring your young children. It is fun for adults, but the Disney magic is made for children!
The Handmade Gift
Jan 11, 2013 Author: Jessy | Filed under: Short StoriesMy son brought home a present he made at four year preschool on the day before winter break, and he was very excited to give it to me. It was wrapped in a white paper lunch bag, stapled shut at the top, decorated with drawings on the bag, his name, and “Mom” carefully written on the top.
He carefully placed it under the tree and every day he checked to make sure it was not moved and that nobody peeked inside. He asked me every day leading up to Christmas if I wanted to open it yet? I told him that it was really special to me, so that I wanted to save it and open it on Christmas day.
One more time on Christmas Eve he checked his present was okay before he went to bed.
When his sister woke him (and me) up at 6:55 a.m on Christmas morning to go see what Santa brought, she took off at a run downstairs, he took off after her but suddenly he stopped, picked up his present for me, and started to run downstairs with it.
As he was running he slipped in his pajama feet and it he fell. The present crashed with a loud thunk and a rattle sound as it hit the ground. He looked up at me with tears in his eyes, “It is glass mom, I think I broke it!” I said “It is okay buddy, even if it is broken, I will still love it.” I carried it the rest of the way downstairs and set it down on the table next to where I was sitting to watch them open up their hoard of presents.
He made it through unpacking his stocking and opening one more present before he looked at me and said “Mom, why didn’t you open your present yet?” I said, “Okay buddy, I will open it now.”
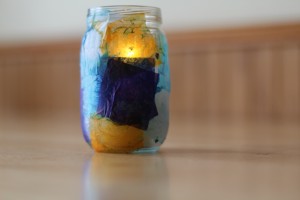
He was perfectly content to stop opening his own presents to stop and watch me. I opened it up, I pulled it out, and he saw that it was not broken he sighed in relief. His gift was a baby food jar decorated in tissue paper squares, that were painted on with glue, and a small tealight candle sat inside to create a candle holder.
I told him I loved it, and thought it was beautiful and asked him how he made it, he told me he did it all by himself but the teachers cut the pieces of paper for him to put on. Then he said, “Can you light it?” I went and found a lighter and lit it. He stood and looked at it a full minute before he was content to go back to opening his own presents.
The most important present for my son this Christmas was not the plasma car, not the General E. Lee, it was this handmade gift that he created with pride and love for me. It sits in a special place on the center of our kitchen table.
Categories
- Family Management (26)
- Food (21)
- Health & Safety (32)
- Home & Garden (13)
- Park Reviews (4)
- Product Reviews (12)
- Projects and Crafts (2)
- Short Stories (23)
- Think About It (25)
- Uncategorized (6)
Top 10 Lists
Blogs this Month
| M | T | W | T | F | S | S |
|---|---|---|---|---|---|---|
| « Aug | ||||||
| 1 | ||||||
| 2 | 3 | 4 | 5 | 6 | 7 | 8 |
| 9 | 10 | 11 | 12 | 13 | 14 | 15 |
| 16 | 17 | 18 | 19 | 20 | 21 | 22 |
| 23 | 24 | 25 | 26 | 27 | 28 | |
Archives
- August 2016
- June 2015
- July 2014
- April 2014
- January 2014
- January 2013
- December 2012
- September 2012
- August 2012
- May 2012
- February 2012
- January 2012
- September 2011
- February 2011
- January 2011
- December 2010
- November 2010
- October 2010
- September 2010
- August 2010
- July 2010
- June 2010
- May 2010
- April 2010
- March 2010
- February 2010
- January 2010
- December 2009
- October 2009
- September 2009
- August 2009
- July 2009
- June 2009
- May 2009

