Best Way to Remove Wallpaper
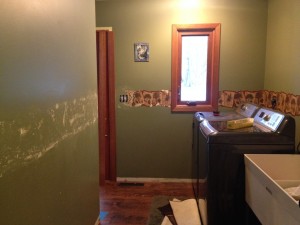
Apr 14, 2014 Author: Jessy | Filed under: Home & Garden, Product Reviews, Projects and CraftsWe purchased a new house a few months back and there was a tree wallpaper border in the laundry room. We were replacing the trim and wanted to repaint the laundry room to match the adjoining great room. The wallpaper border was peeling and curling on the edges so I was sure it would be easy to remove. I made the first rip on one of the loose edges and only got about 1 inch off, now it was too late, I couldn’t go back, I tried the other peeling edge, no better luck.
I remembered the previous homeowner left two gallons of wallpaper remover gel in the basement when they left. I ran downstairs, grabbed a jug, grabbed a sharp knife to score the wall, got a paint tin and a paint roller and started rolling. I scored the heck out of the wall, coated the wallpaper with a thick layer of wallpaper remover and let it sit for 30 minutes. I came back 30 minutes later and was ready for the magic to begin, ready to use my putty knife and watch the wallpaper just fall off the wall with no effort. I pushed the putty knife to the edge of the border and was greeted with a fully stuck border. I scraped and scraped and got nothing, I reapplied the wallpaper remover, and tried removing it after round two, nothing, then I reapplied again and covered it with a layer of saran wrap and let it sit for another 3o minutes, went back at it and was greeted with more of the same, a stuck layer of wallpaper. I tried a new method and used a water spray bottle to saturate the wallpaper that had been coated with plenty of wallpaper remover and finally was able to remove that section with lots of elbow grease. I got small chunks off of the 10 foot area bit at a time from the wall and finally finished one wall after about 4 hours. Yes, seriously.
I know this wallpaper was not properly sized, maybe if the previous homeowner had prepped the wallpaper correctly the wallpaper remover would have worked.
I posted a photo of this frustrating wallpaper removal project on my facebook page with the description, “I am pretty sure they sold this house because they did not want to remove this wallpaper!” I had many suggestions from my friends on how to get the rest off. I could have rented steamer to remove the border but I was only removing a small section of wallpaper so I did not. I wanted to test the typical homeowner wallpaper removal methods recommended by my friends. I decided to try all of them in a side by side test, I also took photos to see what method worked best.
I went and picked up a few supplies from Menards to make the job easier. I got a scraper tool and a wallpaper scorer tool.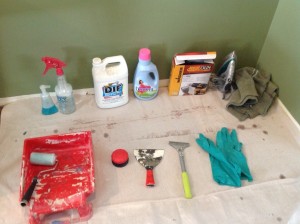
I divided the wall into five separate sections, marked each with a permanent marker, scored those that needed to be scored and started trying each method.
My first section of wall was the hot iron and wet towel method. This is a home made steamer. I soaked the towel, hung it on a hook, so I could have one hand free for the iron and one for the scraper, I pushed the iron on the wet towel to create lots of steam. I was not able to get much off so I quickly scored it in order to get more steam behind the wallpaper. I then tried again. This time I was able to scrape small sections off the wall at a time. About an iron width section at a time, it took some elbow grease, but it worked! It took time, but was much less work than my work the day before.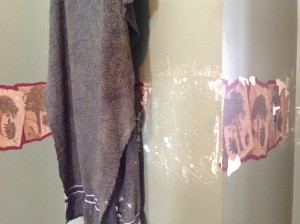
My second section was a heat gun. This was interesting and is what wallpaper pros use to remove wallpaper in office buildings. We had a heat gun, I turned it on High and started heating up the wallpaper to see what would happen. It made the plastic coating melt and I was able to scrape it off with the scraper. I removed the entire plastic coating with a slow but relatively easy process. It was a hot process, the whole room smelt like melted plastic and created really hot walls. It burnt the paper under the plastic in a few places. But the wallpaper base paper was still stuck firm. I said now what, so I sprayed the whole area with my water bottle and actually heard the wall sizzle, it made steam billow from the screaming hot wall, and was able to scrape the paper backing off with no work at all! My big problem in this one was I was afraid with how hot the wall became, I worried about electrical and plumbing behind the wall. It made the sheetrock almost soft and I bubbled the paint in places under the sheetrock. I had to patch the wall in a few places because of the bubbled paint and the nicks in the soft sheetrock. If you were going to rewallpaper and knew where all of your electrical wires were, this would be a great method, maybe with more practice I would have been able to get it. Keep in mind you are basically throwing glowing red heat at your walls.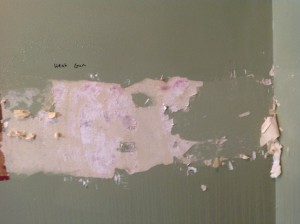
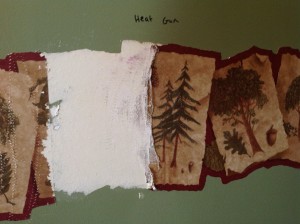
My third section was the fabric softener section, I applied a thick layer of downy to the scored wall and let it sit, applied a second layer, and then tried to scrape the wall, with just fabric softener alone it was not very effective, It worked, but it did not scrape well. I sprayed water from my water bottle and soaked the wall on top of the fabric softener and it came off, a little at a time, small layer at a time but it came off with some effort. This method sure made the house smell great though, if you are into the scent of fabric softener.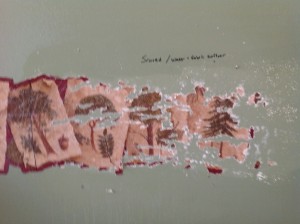
My fourth section was the DIF Gel wallpaper remover again, following the directions, and giving it another shot. I might be a conspiracy theorist but I actually think the remover made the glue adhere to the wall more firmly. It might be DIF’s genius marketing plan, get the consumer to buy more wallpaper remover to remove the wallpaper that the wallpaper remover cemented to the wall. I then tried the same method I used on the painful wall the day before and soaked it with the spray water bottle. I was able to get more off but it was stuck, I actually stopped out of frustration because I was dinging up the wall and working so much harder than I did on the previous three methods, and went to the next section.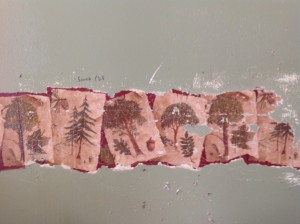
My fifth and final section was a scored wall rubbed with dawn original blue dish soap and sprayed with water. This was amazing! It instantly loosened up the glue! I got the edges off and small sections with the first application. I reapplied and used more water and got the rest of the section off in record time!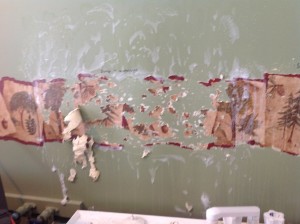
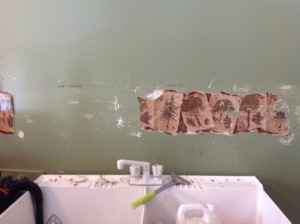
I chose to finish removing the rest of the wall with the dish soap of all of the methods, I felt this was the least amount of effort, mess and work. You can see on my final results which sections did the most damage to the wall. 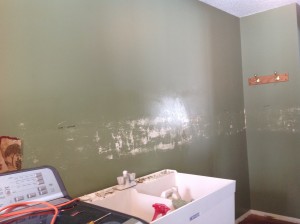
I washed the remainder of the wall off and spackled a thin layer over the wall to cover up the score marks any nicks, burn marks, then sanded, primed and painted the room. I am happy that my laundry room that is no longer 90’s green with a peeling border. If you are trying to remove dreaded wallpaper, hopefully one of these methods will help you have a faster wallpaper removal project!
Categories
- Family Management (26)
- Food (21)
- Health & Safety (32)
- Home & Garden (13)
- Park Reviews (4)
- Product Reviews (12)
- Projects and Crafts (2)
- Short Stories (23)
- Think About It (25)
- Uncategorized (6)
Top 10 Lists
Blogs this Month
| M | T | W | T | F | S | S |
|---|---|---|---|---|---|---|
| « Aug | ||||||
| 1 | 2 | 3 | 4 | 5 | 6 | 7 |
| 8 | 9 | 10 | 11 | 12 | 13 | 14 |
| 15 | 16 | 17 | 18 | 19 | 20 | 21 |
| 22 | 23 | 24 | 25 | 26 | 27 | 28 |
| 29 | 30 | |||||
Archives
- August 2016
- June 2015
- July 2014
- April 2014
- January 2014
- January 2013
- December 2012
- September 2012
- August 2012
- May 2012
- February 2012
- January 2012
- September 2011
- February 2011
- January 2011
- December 2010
- November 2010
- October 2010
- September 2010
- August 2010
- July 2010
- June 2010
- May 2010
- April 2010
- March 2010
- February 2010
- January 2010
- December 2009
- October 2009
- September 2009
- August 2009
- July 2009
- June 2009
- May 2009


Leave a reply